January 31, 2011
Baked Oatmeal

Do you like oatmeal? I do, but I like it more in baked goods than I do as a hot cereal. Maybe it’s the mushiness I don’t care for. This is an adapted version of a baked oatmeal recipe I posted in my first month of blogging. I made this one dairy free, of course, but I also reduced the amount of oil and sugar, substituting apple butter and some agave nectar. If you don’t have apple butter, use apple sauce instead and increase the amount of cinnamon to 1 1/2 tsp. or to taste. Honey or maybe maple syrup would probably work well in place of agave.
I love baked oatmeal, and I especially love that I can put it together the night before, then just pop it in the oven in the morning. My oven has a delayed cook feature that I use to get the oven preheated before I’m out of bed. I set it to bake at the desired temperature about 10 minutes before I get up. Then it’s ready for me to pop in the casserole dish as soon as I’m up.
Note on oats: Mainstream oats are heavily contaminated with wheat and not considered gluten free. There are several brands of gluten-free oats that can be purchased. Unfortunately, they are expensive, but Amazon offers some of the best deals. Some people react to Bob’s Red Mill products, and I prefer to use Cream Hill Estates brand which are GFCO certified. Also, please keep in mind that a small percentage of people with celiac disease do not tolerate oats.

Gluten-Free Baked Oatmeal
Preheat oven to 350°- 3 c. oatmeal (instant or regular)
- 1/4 c. brown sugar
- 1/4 tsp. cinnamon
- 2 tsp. baking powder
- 1/2 tsp. salt
- 1/2 c. apple butter
- 1/3 c. agave nectar (or try honey or maple syrup)
- 3/4 c. almond milk (milk, or other milk sub.)
- 2 large eggs, lightly beaten
- 1/4 c. oil (I used melted palm oil shortening)
- 1 tsp. vanilla
Combine the first five ingredients (oatmeal through salt) in a mixing bowl. Add the remaining (wet) ingredients and mix well. Spread in a greased 9 x 13 inch baking dish. You can bake it immediately or cover and refrigerate overnight.
Bake at 350° for about 30 – 40 minutes. Cooking time depends on whether it is chilled and the exact size of the dish you use. It should be set in the middle.
View Printable Recipe
This recipe is linked to Real Food Weekly and Slightly Indulgent Tuesdays.
Labels: breakfast recipes
January 30, 2011
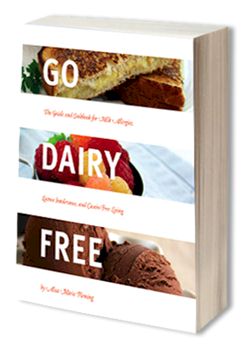
Go Dairy Free – Review & Giveaway
I thought this book review and giveaway would be a great wrap up to my mini series on eating dairy free. If you missed the previous posts, you can read them here:
How to Go Dairy Free
How to Go Dairy Free Part 2: Substitutes
How to Go Dairy Free Part 3: Adapting Recipes
What I have written, however, is only a brief introduction by someone who has not been dairy free for long.
If you are serious about going dairy free, or are seriously thinking about it, Go Dairy Free by Alisa Fleming is the book to buy. What I love about Go Dairy Free is that it is full of information. Everything I wanted to know about eating dairy free is in this book. All the questions I have asked about the dairy free diet are answered in this book. But that’s not all. The book is also packed with all types of recipes.
I need to be clear with my readers. This is not a gluten-free book. It does not discuss the gluten-free diet and the recipes are not all gluten free. Many are naturally gluten free, but others (especially the breads and sweet stuff) are not. Have no fear! One of the great features of this book is a Recipe Food Allergy Index at the back. Each recipe with page number is listed and a chart indicates if it is vegan, egg free, soy free, gluten free, wheat free, nut free, and/or peanut free. The recipes in this index are listed by category so it is easy to look up the ones you are interested in.
Since I’m comfortable with adapting recipes, the recipes in this book that caught my attention were for things like making your own spread (who knew homemade coconut butter was so easy?), cheese alternatives, and substitutes for various forms of milk.
Except for the front and back cover, the book does not contain any photos. It’s all black and white, which I don’t mind, but the print is on the small side (I know, you hear that a lot from me). I think it is well worth the list price of $19.95, but right now it’s only $13.41 at Amazon
To find out more about the book, visit the Go Dairy Free website. You can view the Table of Contents, which gives you a very good idea of all the information presented in the book, and the Recipe Index which includes some photo links.
The Giveaway
One winner will receive a copy of Go Dairy Free by Alisa Fleming. To enter you must be a U.S. resident, and you must leave a comment on this post. Leave a separate comment for each entry. Please make sure I have a way to contact you. Up to four entries per person:
- Tell me what interests you about this book.
- Subscribe to my feed via RSS or email (or tell me you already do)
- Like me on Facebook (or tell me you already do)
- Follow me on Twitter (or tell me you already do)
Disclaimer: I was sent a free copy of Go Dairy Free for review. The opinions in this post are my own.
Labels: books, dairy free, giveaway, reviews
January 29, 2011
Surfing Saturday 1/29/11
 Image via office.microsoft.com
We had snow this week. I love to watch it falling and the change of scenery it gives. I'll be finishing up my clean kitchen challenge this weekend. I hope you have a good one!
Gluten-Free/Celiac
Boston Market Gravy Goes Gluten Free
Univ. of Connecticut's Gluten-Free Food Program a National Model
New Saliva Test Could Help Diagnose Children
Cooking/Recipes (not necessarily gluten-free but adaptable and/or inspirational)
25 Healthy Chicken Breast Recipes
5 Easy Pantry Meals for Busy Weeknights
How to Fix Those Little Kitchen Accidents
Home/Family
How to Make Drop Cloth Curtains
How to Make a Cardboard Box Oven
10 Quick Headache Cures
Computer
15 Free Guides That Teach Useful Stuff
2020 - Computers on Our Wrist
How Operating Systems Work
Animal/Nature Photos
Cute Dog
Pretty Winter Scene
Giraffe Licking a Squirrel
Animal Photos
Labels: surfing Saturday
January 28, 2011
Fried Rice Variations

It’s been a while since I posted a dinner recipe, and most of us benefit from a few new dinner ideas. If you’re like me, it can be easy to get stuck in a rut of making the same recipes. That’s why I love sharing what we’re having for dinner on my Facebook page. On weeknights, I post what we’re having (usually between 5:00 and 6:00 p.m. eastern time) and other people leave comments telling us what they are having. It’s a great place to get new ideas, especially if you are new to the gluten-free diet.
This dinner is nothing fancy. It was quick and easy and also quite good. In fact, I was simply using up leftovers in my refrigerator. I want to share it with you to remind you that we don’t always have to follow recipes exactly as they are used traditionally. Fried rice is a well known dish, and the idea of it can be used in many ways. For this meal I fried leftover rice, red quinoa, and pasta. I didn’t have enough of any one of those, but combined, it was just the right amount.
I added in cubed leftover pork chops, zucchini, and of course egg which is a common ingredient in fried rice. The great thing about fried rice is that you can use so many different ingredients. By varying the meat, vegetables, and grain, you can create numerous meals that are basically the same recipe but taste very different. Here is a version I made using brown rice, onions, red pepper, zucchini, mushrooms, and ham.

In addition to being quick and easy, fried rice is also a frugal meal for several reasons. 1) If you use leftovers as I did, then it's a great way to keep food from going to waste. 2) You can use only a little meat and add eggs for additional protein. 3) Rice is generally inexpensive. Quick. Easy. Frugal. Tasty. What more could you ask for?
I don’t have a real recipe for you, but I’ll give you some guidelines for those who aren’t used to making fried rice.
Basic Fried Rice
(amounts are all approximate)- 4 cups cooked rice, pasta, other grain, or a combination
- 2 Tb. high heat oil of choice
- 1-2 c. leftover cubed meat (beef, pork, ham, or chicken)
- 2 c. chopped vegetables (peas, broccoli, zucchini, carrots, mushrooms, onions, peppers, etc.)
- 2 eggs, beaten
- 2 Tb. soy sauce (I used a soy-free coconut version)
- salt & pepper to taste
View Printable Recipe
You can find other frugal ideas at the Frugal Fridays blog carnival at Life As Mom. For more real food recipes, check out Real Food Weekly at the W.H.O.L.E. Gang.
Labels: main dish recipes, pork
January 25, 2011
Gluten-Free Wednesdays 1/26/11

Welcome to Gluten-Free Wednesdays! I didn’t get to visit as many links as I had hoped last week, but I did have a wonderful couple of days with my parents. They moved recently and still need help settling in and cleaning out their old house. Thanks for everyone’s participation. There were lots of great looking links.
Monthly Challenge: January’s challenge is to make a gluten-free biscuit. I have plans for one more biscuit experiment here at the end of the month. If it turns out, I’ll be sharing the recipe soon. You have until next week to link up biscuit recipes because I won’t get February’s challenge posted until the end of next week.
Last Week’s Highlights: The biscuit recipes really started rolling in last week. Be sure to check these out.
Cheddar Biscuits from Gluten Free Birmingham
Lemon Currant Scones (Vegan & Soy Free) from Without Adornment
The Most Amazing Biscuits from gluten free diva
Grain-Free Cheese Biscuits from Chickiepea’s Blog
Lowfat Biscuits from Book of Yum
Sweet Potato Biscuits (Dairy, Egg & Soy Free) from gluten free gigi
Gluten-Free Biscuits from Gluten Free Recipe Box
Susannah's Gluten-Free Biscuits from Seven Sisters
Guest Post: This week I have a guest post over at Lisa's Gluten-Free Advice and Healthy Living where I share my split pea soup recipe.
My Submission: A terrific muffin recipe.

The Carnival: If you’re new, please read the guidelines. All gluten-free eating links are welcome (it doesn’t have to be a monthly challenge recipe) as long as you leave a link back.


Labels: Gluten-Free Wednesdays
Kitchen Tip: Storing Non Perishables

Today’s kitchen tip is from Andrea of Andrea’s Kitchen. Be sure to stop by her gluten-free blog if you haven’t been there before.
Andrea recommends dating all your non-perishable items, including canned foods, pasta, and spices, as soon as you bring them home from the store. Andrea says,
“I started doing this when my husband and I moved several times within a few years and I realized I kept seeing some of the same canned goods and I started wondering how old they really were! I like to use canned beans to make bean salads, and I also realized that they tasted better and had a better texture if they were consumed within about 6 months, despite the stamped date on the can. Dating cans helps you to use them in the order you bought them too.”Thanks for the tip Andrea. If you have a kitchen tip you would like to share with everyone, send me an email.

What do you do to make sure you use your non-perishable items in a timely manner?
Labels: Kitchen Tip
January 24, 2011
Cranberry Walnut Muffins

Muffins are wonderful. Don’t you think so? They are a nice serving size and work perfectly for an easy snack or breakfast. They can satisfy that desire for something bready, and they are so very versatile. You can vary the flours and the add-in options are numerous. Try a variety of nuts, fresh, canned, dried, or frozen fruit, chocolate or other sweet “chip”, coconut, or seeds. You can do all kinds of things with muffins!
As much as I love them, I hadn’t made any in a while. I guess I became too busy with holiday baking, and as a result muffins were neglected and almost forgotten. Almost. Who could forget them? When I did remember, I decided I needed to create a new muffin recipe I could share with all of you. It had been a while since I posted a muffin recipe, and I was in the mood to try something new.
As usual, I made a double batch of these. I often intend to freeze some, and while that does happen at times, more often than not, all the muffins get eaten in a few days. That was the case with these. We enjoyed them and I bet you will too.

Gluten-Free Cranberry Walnut Muffins
Preheat oven to 400°- 1/2 c. sorghum flour
- 1/2 c. brown rice flour
- 1/2 c. sweet rice flour
- 1/2 c. + 2Tb. potato starch
- 1/4 c. tapioca starch
- 1 tsp. xanthan gum
- 1 Tb. baking powder
- 1 tsp. baking soda
- 3/4 tsp. salt
- 1 tsp. unflavored gelatin (optional)
- 1/2 c. sugar
- 1/4 c. melted coconut oil (or cooking oil of choice)
- 1 c. milk or milk substitute (I used Almond Breeze original)
- 1 tsp. vanilla extract
- 2 large eggs
- 1/2 c. chopped toasted walnuts
- 1/2 c. dried cranberries
Soon into a greased muffin tin. Bake at 400° for 18 – 20 minutes. Let cool in the pan for several minutes then remove to a wire rack.

View Printable Recipe
This recipe is part of Slightly Indulgent Tuesdays.
Labels: bread recipes, breakfast recipes
January 23, 2011
How to Go Dairy Free Part 3: Adapting Recipes

In this final post of my recent dairy free series I would like to tell you about recipes I have converted to being dairy free. I hope it will inspire you to try dairy free versions of your favorite recipes. You can read the first two posts in this series here:
How to Go Dairy Free
How to Go Dairy Free Part 2: Substitutes
Next week I will share a book review of Go Dairy Free and have a book giveaway!
In the recipes below I have made only a couple of simple substitutions. I used almond milk in both baking and cooking recipes that called for milk. For butter, I substituted Earth Balance buttery sticks or shortening sticks or Spectrum organic shortening. I have also successfully used coconut oil at times. Other than using Daiya cheese on pizza, that’s all it took to make these recipes. Going dairy free has been much easier than I ever expected.
Pizza – I have two pizza recipes on this site. The first is a large recipe and is a favorite of my family. The crust uses powdered milk. I have adapted it by omitting the powdered milk and using almond milk instead of water. I always hold back some of the milk and add the rest as needed to get the right consistency. My second pizza recipe makes a single crust and was simplified by using milk instead of powdered milk. I also substitute almond milk in this recipe.

When making pizza for the family, I make all of the crust dairy free. I then use Daiya cheese on part of the pizza and regular cheese on the rest of it. I’m careful to not let the cheese overlap and to cut within the dairy free line. My family has not minded the switch to a dairy free crust at all. The last couple of crusts I have made have been wonderful.
Cookies – I made several cookies at Christmas time using butter substitutes. I was doing most of my baking at my sister’s house. She was unable to find the Earth Balance buttery sticks and bought the shortening sticks instead. They worked great and everyone enjoyed the cookies. I made spritz cookies and snickerdoodles that way. I also made sugar cookies and thumbprint cookies before I went to my sister’s and used a combination of butter substitutes. They both turned out great, but the coconut oil I added to the sugar cookies did add some coconut flavor.
 (Yes, I know that icing is full of nasty food coloring. It was a once a year treat.)
Cinnamon Rolls – Cinnamon rolls are a Christmas morning tradition at our house. Since we were at my sister’s for Christmas this year I prepared a mix of the dry ingredients at home. I used Spectrum shortening sticks and almond milk to make the rolls. They turned out great and everyone enjoyed them. I don’t have a picture of the dairy free version, but they really didn’t look any different.

Pumpkin Pie – I really thought this would be difficult for some reason. I guess I didn’t have enough experience with converting recipes, because I learned that dairy-free pumpkin pie is very easy to make. I cut back the amount of liquid in my original recipe, increased the pumpkin puree by the same amount and used almond milk. My brother in law enjoyed the pie so much at Thanksgiving that he asked me to make one for Christmas.

The pie crust I used in November was made dairy free by substituting Spectrum organic shortening for the butter. In December, I made the nut crust that I used to use for cheesecake. I used Earth Balance shortening sticks in place of the butter. Both crusts turned out well.
Soup – A couple of our favorite soups are chowders. The first time I made our favorite potato chowder dairy free, I really thought I would hear some complaints. I made the recipe as usual but used almond milk instead of cow’s milk. I didn’t say anything when I served it, and everyone ate it up as usual. It wasn’t until the end of dinner that I mentioned I had used almond milk, and everyone responded with “Well, it was still good.” Since then I have used almond milk in other soups also.

There have probably been other recipes I have converted, but hopefully this is enough to help you see how easy it is. I admit that I have not made any of my old favorite cheesy casseroles. I know they could be made using Daiya or some other cheese substitute, but I know it won’t be the same. For dinner meals I tend to go with more naturally dairy free recipes or at least cheese free (except for pizza), and I don’t think that’s a bad thing.

What are some of your favorite recipes that you have converted to dairy free?
Labels: dairy free
January 22, 2011
Surfing Saturday 1/22/11
 Image via office.microsoft.com
Gluten-Free/Celiac
Subway Testing Gluten-Free Sandwiches
USDA Scientists Produce Palatable Gluten-Free Bread
Gluten Free But Still Feeling Ill?
Cooking/Recipes (not necessarily gluten-free but adaptable and/or inspirational)
West Bay Johnnycake Recipe
Chicken Tortilla Soup
Healthy Soups
Sea Salt & Gourmet Salts Guide
Home/Family
Hints and Things
Household Products Database - Health & Safety Information
Project Laundry List
Computer
7 Collaborative Storytelling Websites
How Much Data is That?
Animal/Nature Photos
Dogs in Snow
Various Animals in Snow
Blue Flower
Waterfall Scenic Photo
Labels: surfing Saturday
January 21, 2011
Keeping a Clean Kitchen Update

When I published the first Keeping a Clean Kitchen challenge last week, I wasn’t sure how people would respond. Honestly, I was afraid it would be a real flop. While I didn’t get an overwhelming response, I was happy to receive a few comments and a number of emails from readers who thought it was a great idea. I even received before and after pictures from one reader.
As promised, here is an update on how I am coming along with January’s tasks.
First, I gave my sink a thorough cleaning. I do this on a regular basis since the sink does get very dirty and can harbor germs. Also, my sink is white so the dirt really shows. I’ve not been happy with my white sink. I’m not sure what material it is made of, but it has scratches, nicks, and stains. I very seldom use chlorine bleach since it gives me a long lasting head ache. It’s just not worth it. I usually use powdered OxyClean in the sink as a bleach alternative. I have also used Borax and baking soda, and of course, regular liquid dish washing detergent. If anyone has any tips for getting this particular type of sink clean, I would love to hear from you.
The sink pictures didn’t turn out well, but here’s an after photo to show that I did clean it. The marks you see if you look closely are stains.

Next, I cleaned my kitchen window. It is not big, but it is right above my sink (as most are) and gets dirty from sink splashes and such. I cleaned the window inside and out as well as the window sill, frame, and the track that the window slides on.

I really enjoy my kitchen and the view. In fact, when we bought this house, it was primarily chosen for the kitchen (it’s potential at the time) and the back yard. We had the fish pond redone and added the waterfall. I especially love it when a great blue heron happens to drop by and visit the pond. Of course, it looks much greener in the spring.

Next, I went to work on an 8 foot sliding glass door in the eating part of the kitchen. It really is a door, but it’s also a window and it needed to be cleaned. I didn’t clean all of the outside because of the cold weather, but I cleaned the inside windows, frames, track, and the vertical blinds.
It was difficult to get a picture that showed the dirt on this window. Our two dogs love to stand at the window and look outside so there is one strip on the lower part that is covered with dog nose marks. You can vaguely see it in the lower part of this picture:
 One thing I have found that helps with these nose marks is to put RainX (the kind you use on a car windshield) on that part of the door. It keeps the door looking clean longer and makes it easer to wash the marks off. If you give it a try, do a small area first. Applying it so that it does not leave a cloudy film can be a bit tricky. Here is the window after it was washed.
The dirt in this lower door track is a bit easier to see than that on the window. I vacuumed up the loose dirt, then used the damp paper towels that I had used on the window to get the worst of the dirt up. Then cleaned it again with a clean towel.

It didn’t look perfect in the end, but certainly better.

Still to be done: Two ceiling fans with lights.
How is it coming along at your house?
Labels: Keeping a Clean Kitchen
![]()
Subscribe to Posts [Atom]
