August 12, 2010
Using Leftovers
 1. Lunch: For those on a gluten-free diet, lunch can be a challenge. If you make a gluten-free dinner, why not save some for lunch the next day. My husband is not gluten-free, but he likes to take leftovers for lunch because he’s not fond of sandwiches. At work he has access to a microwave which he uses to reheat the food. I bought these oval CorningWare dishes with plastic lids
 to use for his lunches. The oblong shape allows me to place different parts of the meal in an appetizing way. For example, he can have meat, potatoes, and a vegetable side by side and not piled on top of each other.
2. Repurpose: Use your leftovers in a different way than you used them the first night. This is easy to do with meals that have separate parts. The first night, eat them separate (i.e. chicken, rice, veggies) then another night use them in a different way such as fried rice, soup, or a casserole. Intentionally cooking more than you need the first night so that you can use it for a different meal is also a great idea.
3. Freeze: If you don’t like having for lunch the same thing you had for dinner the evening before, you can freeze lunch size portions for another day when you will be in the mood for it. You can also freeze leftover food to be repurposed later. Many people keep small amounts of leftovers in the freezer until they have enough to make a great soup.
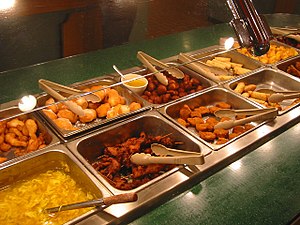 4. Buffet: My kids actually enjoy leftover night. When I have leftovers from two or three meals, and for some reason they haven’t gotten used up for lunches, I have a leftover night. I heat up all the food and put it out buffet style for the kids to pick and choose what they want. I only require that they do have some vegetables. They love being able to choose what they want and to combine the foods in a different way than they were originally combined. Image via Wikipedia—not one of our buffets!
How do you use leftovers?
For more money saving ideas visit some Frugal Friday links.
Labels: frugal tips

July 8, 2010
Finding Cookbooks at the Library

I love the library. I even know my 14-digit library card number by heart. I am very grateful that I happen to live in an area that has a great library system. No matter where you live, I’m sure your library has at least a few cookbooks, and these days it probably has some gluten-free cookbooks. When I was first diagnosed with celiac disease over nine years ago, I didn’t know how to cook anymore. Then a friend who had recently put her son on a gluten-free diet told me she found gluten-free cookbooks at the library. I rushed off as soon as a I could and sure enough, there were several cookbooks by Bette Hagman. It was a life saver.
Today, finding recipes isn’t so hard. There are many great recipes on blogs and other web sites, and there are many more gluten-free cookbooks available than when I started out. If you are new to the gluten-free diet, the library can be a good place to start. Since there are so many cookbooks to choose from out there, the library lets you try them out and see which ones you like best. Gluten-free cookbooks are usually filled with useful information as well as recipes, and borrowing a book from the library is free!
If you’ve been gluten-free for a while, you might be like me and just want to look for some new ideas. Many times I’ll find a cookbook that has only a few recipes I like. There’s no sense wasting my shelf space on the whole book. I write down the recipes and make note of the source, and the book goes back to the library.
Once you are comfortable with the requirements of a gluten-free diet, don’t limit yourself to gluten-free cookbooks. A book filled with baking recipes won’t be helpful, but there are many cookbooks with great meal recipes that are naturally gluten free or can easily be made so. If you are looking to expand your repertoire, you’ll find many more choices at the library if you consider all the cookbooks.
Many libraries also have a store where they sell used books. My library has a very small one, but I always take a look. I recently found this book for $0.50.

With all the zucchini I’m getting from my garden, I was thrilled. I have marked numerous pages in the book. Even if I don’t follow a recipe exactly, it gives me a starting point and ideas to try.
If you haven’t been to the library in a while, give it a try. You will find the cookbooks in the 641 section.
For more money saving ideas visit Frugal Fridays at Life as Mom.
Labels: books, frugal tips
June 3, 2010
Keeping the Kitchen Cool
![41ut2PwA9CL._SL160_AA115_[1]](https://blogger.googleusercontent.com/img/b/R29vZ2xl/AVvXsEgSC8fl-rn21xABl4NtyWAoWuc1Z8joX3UYNQaE9LM3OiSwRO74mrnQ7-Du7CjfdpghoFKzTDGtYcmNsqbDidBhuJqSn-_cift9d4fpuX3n3-7i50x49DHe0H6rCacy1dWP4LcEeYH5tPhr/s1600-h/41ut2PwA9CL._SL160_AA115_%5B1%5D%5B4%5D.jpg "41ut2PwA9CL._SL160_AA115_[1]")
Grill. That’s a pretty obvious one for most of us. A grill keeps the heat outside. Many gas grills also have side burners allowing you to prepare multiple parts of the meal outside. All kinds of meat, poultry, and fish can be cooked on the grill, as well as many vegetables.
![41OtZjbJHsL._SL160_AA115_[1]](https://blogger.googleusercontent.com/img/b/R29vZ2xl/AVvXsEjs9hkUqXEwIPkjnNEQlUgZ9_AUCjTyZavfrhXKYAKdlk3fdGfj03dVDrZjrnAFceTf0dlndk1aXeV5RThWtY0l5dmWFYu7r79dN2zC3BTFSrT8_CYQakKW-uv_fWknal0owl-m75oiHsiZ/s1600-h/41OtZjbJHsL._SL160_AA115_%5B1%5D%5B3%5D.jpg "41OtZjbJHsL._SL160_AA115_[1]") Slow Cooker. I plan on buying a new one soon and hope to use it frequently this summer. Since crock pots run hotter than they used to, you might find it heats up the kitchen more than you would like. For that reason, many people put theirs outside or in the garage. I hope to try that too.
Slow Cooker. I plan on buying a new one soon and hope to use it frequently this summer. Since crock pots run hotter than they used to, you might find it heats up the kitchen more than you would like. For that reason, many people put theirs outside or in the garage. I hope to try that too.![31aJnWAljmL._SL160_AA115_[1]](https://blogger.googleusercontent.com/img/b/R29vZ2xl/AVvXsEjlx3Gu3yaDJ2qZza23-wjNIgPiX1fioeAOdxRBQqf3wqdzmrOFRJfDYjDiemyxwCv8MWHlPH9cSJy1QImoxqXvQbCw4LjQCs4_uiwebWNDImHgJr5qkoNZCnGxAFdIUkOK3eNwiCG2u7HC/s1600-h/31aJnWAljmL._SL160_AA115_%5B1%5D%5B4%5D.jpg "31aJnWAljmL._SL160_AA115_[1]") Pressure Cooker. I love pressure cooking. If you haven’t bought a pressure cooker yet, the summer is a great time to give it a try. I highly recommend Kuhn Rikon, though it is costly. I bought a second one on eBay and I often use both my pressure cookers for one meal. A pressure cooker has several advantages, but the biggest one is that it cooks faster than regular methods. Faster equals less heat and energy used.
Pressure Cooker. I love pressure cooking. If you haven’t bought a pressure cooker yet, the summer is a great time to give it a try. I highly recommend Kuhn Rikon, though it is costly. I bought a second one on eBay and I often use both my pressure cookers for one meal. A pressure cooker has several advantages, but the biggest one is that it cooks faster than regular methods. Faster equals less heat and energy used.![41LA3nzmVsL._SL160_AA115_[1]](https://blogger.googleusercontent.com/img/b/R29vZ2xl/AVvXsEjER7w89e7Mr7nAFrTrX53zUu8JPn3GdUuS-40sLX5LWEfcs_McdPehnLXsJdxpLqg8CZ308fErniEQtQ4obCLl9HVEQ3AqQcWe8HPbspcNcG3OV_bHp01s7NhFg7M2OTLhsf_03eQzMGj5/s1600-h/41LA3nzmVsL._SL160_AA115_%5B1%5D%5B5%5D.jpg "41LA3nzmVsL._SL160_AA115_[1]") Turbo Oven. The Turbo Oven is a countertop convection oven. This is another appliance I use all the time. In the summer it allows me to cook things like roast chicken or oven fries without heating up my big oven. I actually use it for those items year round because it cooks them faster and uses less energy than my conventional oven.
Turbo Oven. The Turbo Oven is a countertop convection oven. This is another appliance I use all the time. In the summer it allows me to cook things like roast chicken or oven fries without heating up my big oven. I actually use it for those items year round because it cooks them faster and uses less energy than my conventional oven.If you are considering buying a turbo oven, I have Aroma brand. I have been happy with the way it cooks, but was very unhappy that the handle broke. It is much more difficult to handle the hot lid with a broken handle. I would not buy that brand again unless they redesign the handle. There are other brands
 to choose from though.
What do you do to keep your kitchen cool in the summer?
For other frugal ideas, visit Frugal Fridays at Life as Mom.
Labels: frugal tips
May 20, 2010
Produce Isle Convenience Foods

Convenience costs. You know that right? In any area of life, convenience costs.
Convenience can be worth the cost. If you don’t have time or energy to fix yourself a salad, buying premade salad can be the right choice. It’s better than a fast food meal. It’s better than many other options. It’s a price you are willing to pay to eat healthy.
Convenience can be too convenient. This is where I get into trouble. I choose that convenient option one busy week, and it was so easy that I buy it the next week when I don’t really need it. It's just so......convenient.

Doing a little extra work saves money. Washing, cutting, and peeling fruits or vegetables isn’t that hard. It isn’t that time consuming. It’s healthier, too, because foods can begin to lose nutrients once that work is done. A little work can mean significant savings.
Make a conscious decision. This is what I’m working on. When I reach for that bag of salad or pre-cut broccoli (my two biggest temptations), I want to stop and make a conscious decision. I want to ask myself if I have a few minutes to do the work myself. Am I only reaching for it because it is convenient? On the other hand, if it is a particularly busy time or I’m sick, and buying that item will mean that we eat healthier, then fine. I am willing to pay for that convenience. Most of the time, though, I can do the work, and I want to consciously choose to eat healthy and save money.
What produce isle convenience foods do you reach for most often?
For other money saving ideas, visit Life as Mom which hosts Frugal Fridays.
Labels: frugal tips
May 13, 2010
Shop Carefully & Buy the Food You Want
 I shop at numerous grocery stores, but not every week. Therefore, if I get home and find I bought something that is bad or damaged, I’m not likely to return it. The hassle of going back to a store that is not “on the way” is just not worth it to me. The result is wasted money.
Since I dislike returning items, and I dislike wasting money, I try to avoid the situation altogether by making sure I buy what I want. Here’s what I mean:
- Check packages of cheese, grapes, berries, or bread for signs of mold.
- Take the lid off a coffee can, yogurt container, spice jar or other similar item to make sure the seal is intact.
- Look carefully at the bag of potatoes to make sure they are not green.
- Move the baby carrots around in the bag to make sure they are wet, but not slimy.
- Check cans for dents.
- Make sure you are buying the right item and not a different variety your family doesn’t like.
- Check jars of pickles or fruit to make sure they are sealed.
- Look over all produce well.
- Check expiration dates, particularly on dairy products.
I’m sure there is something I missed in the above list. What would you add to it?
For more frugal ideas visit Life as Mom.
Labels: frugal tips
January 29, 2009
Saving Money at Home – Windows

My husband is a real handyman. Even he will admit that he’s terribly slow, but he does a good job and saves us lots of money. Since last spring he has been working on replacing our windows as well as adding insulation and siding to the house. The windows are done and only of portion of the back of the house still needs siding.
I won’t bore you with the details, but the difference these changes made in heating and cooling our house was obvious. Of course, we did numerous things at once which contributed to better energy efficiency, but I thought I would single out the windows today.
We had old single-pane windows previously. I can’t tell you how thrilled I am to now have windows that I can actually open and that tilt out for easy cleaning. However, the best benefits (though less exciting) are the energy efficiency benefits. Several things combine to make new energy star windows better than old ones. Things like double panes with a special gas in between and the low-e invisible films.
If you have inefficient windows and plan on staying in your home for a while, you might want to consider replacing your windows. Sometimes a large initial cost must be paid to reap long term benefits. If you have a handyman around like I do, the cost will be lower. I would like to note that if you have a do-it-yourself wannabe husband, windows might not be the best place to start. If the windows are installed improperly, you could end up losing the benefits you thought you were gaining.
If you can’t afford new windows, there are still things you can do to help make them more efficient. Replace broken glass, use storm windows, install weather stripping and draft-blocking devices, and repair any cracked or broken wood. More ideas can probably be found online.
For more money-saving ideas check out Frugal Fridays.
You might also want to visit my gluten-free giveaway which ends Friday night!
Labels: frugal tips
January 23, 2009
Keeping Warm in the House
We all know that lowering the thermostat in the winter saves money. The problem is staying warm while still being able to function around the house. Here are some ways I have found to keep warm without bulk. I don’t use all of these ideas at once. Since I live in Maryland where winters are not too harsh, one or two of them is often enough.
- Long underwear. It comes in different thicknesses and material. I find Duofolds to be too warm for indoors. I like Cuddl Duds
brand. They have a thin polyester blend that goes a long way towards keeping me warm, and I forget they are there. They can be found at many department stores.
- Tank tops. I don’t like long sleeved underclothing, but tank tops work great for me. I have a Cuddl Duds top that is very warm, but I also like using cotton tanks under things. A little bit of clothing can make a significant difference.
- Neck wear. Keeping the blood flowing through your jugular vein warm helps to warm the rest of your body. A thick turtleneck sweater will do the job, but that’s not usually my preference. Even a thin turtleneck shirt helps, but you can boost the warmth with a neck gator (a fabric tube the fits over your head and sits around your neck) or a scarf. I have a thick fleece scarf that only gets in my way and in the toilet! What I like using instead is a thin knit scarf I found at the dollar store. I can wrap it around several times and it stays where I want it. A neck gator is more annoying to put on and take off, but it doesn't have loose ends.
- Vests. Fleece vests were very popular a few years ago and you can still find them. They help keep your body warm (and your neck if you zip it all the way up), but allow your arms to have lots of freedom. Keeping your torso with all its vital organs warm allows your body to work on keeping the extremities warm.
- Blankets. These I use when I’m sitting for a while. I keep throws handy near the computer and places where I read.
If you want to save money, try turning back the thermostat a couple of degrees and using some alternative ways to stay warm. What are your stay-warm ideas?
For more money saving ideas check out Frugal Fridays.
Labels: frugal tips
January 9, 2009
Being Frugal - Links to Some Ideas
- 17 Ways to Get Free Books
- Ideas for Saving Money on Eating Out
- The Cheapest Fruits and Vegetables Month by Month
- 5 Tips for Landscaping on a Budget
- 12 Frugal Exercise Ideas
For mor frugal ideas visit Biblical Womanhood's Frugal Fridays.
Labels: frugal tips
December 11, 2008
Making a Christmas Gift Bag

I found a brown paper bag with Pier One written in the middle on both sides. It was a nice bag with handles, though, so I thought I would decorate it. I didn't have stamps, and that wouldn't solve the problem of the name. Since I had a box of paper to be recycled sitting out for tomorrow's pick up, I decided to look through it. I had several catalogs from places like Harry & David and The Popcorn Factory. They were full of great Christmas pictures. I sat down and started cutting and gluing and ended up with the pictures you see. The kids and I both thought it turned out pretty well.

I saved the wrapping paper and used something I had on hand. What resourceful means have you used to wrap gifts this season?
For more frugal tips check out Frugal Fridays.
Labels: frugal tips
December 5, 2008
Our Christmas Tree
We bought the tree at an after Christmas sale. Trying to get the best tree we could for the money we wanted to spend, we bought one that was very realistic looking. It was full and beautiful. One piece of information they list with the trees is how many tips the tree has. That means how many little branch tips there are. We bought a tree with 5,000 tips. It had way more than most of the other trees. That was why it looked so nice. Unfortunately, I didn't realize that those 5,000 tips had to be shaped when you set up the tree. Yes, 5,000 little fake branch pieces to straighten up and spread out.
Every year it took a long time to set up that tree. Not only did I have to shape the 5,000 tips, but each branch had to be put into the trunk. We had to look at the directions every year. The branches were color coded and had to be put on in the correct order. I never timed it, but I know it took at least 2 hours just to set up the tree. At least it did look really beautiful. I don't remember how many years we had it, but we got our money's worth out of those 5,000 tips.
Last year we passed that tree on to a friend and bought a new one. I'm especially happy with the new one. It has a reasonable 1,500 tips and still looks great. It also comes in three pieces and has lights on it! I timed the set up. It took me 30 minutes to get the box down from the attic (with help) and get it set up (by myself) with lights on and ready for ornaments. Wow! It looks great, too. It's about a foot shorter than our old one, but for having a lot less tips, it still looks nice and full and beautiful.

We bought that tree before Christmas last year at WalMart. I don't remember what we paid. The regular price was $200, but I know it was significantly discounted. We will probably break even after three years of use.
I know there's a lot of fun in picking out or cutting down a real tree. We have done it a few times over the years just so the kids have that experience. Having done it both ways, though, I'm happy with the artificial. Besides, I always seem to have sinus problems when we get a real tree.
For more frugal ideas check out Frugal Fridays at Biblical Womanhood.
Labels: frugal tips
November 14, 2008
Frugal Wall Decor
When I wanted something to decorate a long stretch of soffit in our kitchen eating area, I decided to go with a bird theme. I bought a box of note cards. Each card has a different bird on the front. I then bought some inexpensive frames at Ross or somewhere similar. If you look closely, you can see that the card is a little smaller than the frame on the sides. I suppose some matting would take care of that, but like I said, I'm not a decorator, and it's hardly noticeable when they are high up on the wall. I don't remember how much I paid for the cards and the frames, but it was relatively inexpensive.

Here is a picture I bought years ago at a yard sale for a few dollars. I did replace the frame at some point.

Here is a picture I got from my local freecycle group. It was free!

These wall plaques I bought at Kohl's when there was a good sale and I had a coupon. They were pretty inexpensive. They are small so they look nice in bathrooms or other small areas.

I have a fruit theme in the cooking area of my kitchen. Inexpensive plates like this can be found at thrift stores, dollar stores, and yard sales. Maybe you'll even find a plate hanger to go with it. While this one isn't anything fancy, it helps fill in some space.

A few other ideas:
- Frame a child's artwork.
- Frame a poster.
- Hang homemade/crafted items
- My son took it down so I can't get a picture, but at one time he had a deck of cards placed randomly and overlapping in a circle on his wall. The face cards were facing out and the rest of them were facing the wall so you saw the design on the back of the card.
For more Frugal Friday ideas visit Biblical Womanhood.
Labels: frugal tips, homemaking tips
November 7, 2008
Wholesale Club Membership Fees
BJ's
Regular membership = $45
Rewards Membership = $80 with 2% back on most purchases up to $500 per year. Reward checks, payable to BJ's, are mailed twice a year.
- If you spend $1750 per year ($146 per month) you get back $35 and it costs $45 which is the regular membership price. Therefore, if you spend over $1750 per year, you save money on your membership fee.
- If you spend $4000 per year ($333 per month) you get back $80 covering the whole membership cost. Anything over that amount and you are making money.
Costco
Regular membership = $50
Executive Membership = $100 with 2% back on most purchases up to $500 per year. Reward certificate is mailed annually.
- If you spend $2,500 per year ($208 per month) you get back $50 and spend as much as a regular membership. If you spend over $2,500 per year, you save money on the membership.
- If you spend $5,000 per year ($417 per month) you get back $100 in rewards money and the membership costs you nothing. Anything over that amount and you are making money.
Sam's
Regular membership = $40 with up to 1% back with Sam's Club Discover
Advantage Plus Membership = $100 with up to 2% back with Sam's Club Discover
In this case the regular membership is the best deal. Here's why
- Regular membership - spend $3,000 - $1,000,000 and get 1% back. You break even when you spend $4,000 and make money when you spend more than that.
- Advantage Plus Membership - spend $3,000-$5,000 and get 1% back; $5,000 - 10,000 get 1.75% back; more than $10,000 get 2% back. You have to spend $5,700 to break even.
Shopping at these stores isn't always the most frugal way to go. They seem to be most beneficial for people who are feeding a family and buy a lot of food. When gas prices were high, it didn't make sense to be running to several stores every week to catch special sales. I shopped mainly at BJ's. They take manufacturer's coupons and offer store coupons. Since I now use their Visa card, I get an additional 2% back. I would occasionally go to Shoppers Food Warehouse to get items I couldn't find at BJ's, and would only stop at other stores if it was on my way. With gas prices lower however, I am buying less at BJ's and venturing over to a new Aldi's which is a bit out of the way, but offers better savings.
What stores do you shop at to save money on groceries?
You can see more Frugal Friday tips at Biblical Womanhood.
Labels: frugal tips
October 30, 2008
Credit Card Rewards
There are a number of credit cards that offer rewards. For years, we have used the Toys R Us card. There is no annual fee, and we receive 1% back in Toys R Us gift cards. We use this one card to pay for everything. The bill provides us with a record of purchases, and it can be downloaded into financial programs. We pay the bill off without paying interest, and receive money back. One percent doesn't seem like a lot, but that's $10 for every $1000 spent. They give 4% back on purchases made at Toys R Us.
When our kids were little it was easy to use that money. As they got older, I thought we would outgrow it, but we haven't. One year each of the boys got a new bike. I think that was the year we moved and did a lot of remodeling. Another year they got a Game Cube. Last Christmas there wasn't anything we wanted to get the boys there, but my husband got a GPS! Yes, Toys R Us sells them in the electronics department. They sell cameras too. Also, I can use the money to buy baby shower gifts and gifts for younger nieces and nephews. Over the years we've made a lot of money off that credit card.

As much as we have liked the TRU rewards program, we have decide to move on to another. We just started using a BJ's Visa card. They also have no annual fee and offer 2% back on BJ's purchases and 1% on all other purchases. Since I regularly shop at BJ's, this will give us a higher return, and we won't ever wonder whether we will find something to use the reward money on. If neither of those cards works for you, there are others to be found with a little searching.
I will finish by saying that this idea is for those who are able to use a credit card and pay it off each month. The amount of money you pay in interest is way more than the amount of rewards you earn. I think my husband and I have only paid interest once in our 19 years of marriage, and that was when we accidentally forgot to pay the bill.
For more frugal ideas visit Crystal's blog.
Labels: frugal tips
September 26, 2008
Making Napkin Rings

This week my 12-year-old son and I made some clay napkin rings. My son made most of the ones shown including the pretty purple flower for me and the hammer and saw for his dad.
Here are a few tips for making clay napkin rings and working with clay in general.
1)Buy a single ceramic tile from a home improvement store. Look for one that has a smooth surface. Use this to work with the clay and roll it out. When the piece is ready for baking, leave it on the tile and put it in the oven.
2)Having special tools isn't necessary, but if you work with clay much it is very helpful. My son put tools on his birthday list last year. This picture shows a few that he uses often.

3)To bake the napkin rings, I slipped them over the neck of a glass bottle. This helped them hold their shape and not get flat on the bottom.
4)We didn't do this, but putting a piece of wire inside the ring will add strength.
5)Be creative and have fun!
I hope this can count as a Frugal Friday post since it's about making something rather than buying it. For more frugal ideas go here.

Labels: frugal tips, homemaking tips
September 19, 2008
Making Cloth Napkins

I started by going to the thrift store to see what I could find. I came home with 8-10 napkins which we tried out as soon as I washed them. I soon learned two things: (1)the size was much bigger than we needed for everyday use, and (2) we were going to need a lot more napkins!
One way to help solve both of those problems was to cut the napkins into quarters, thereby reducing the size and increasing the quantity. I also went to the fabric store and bought two yards of flannel in two different patterns. I then made 12 napkins from each yard. Some of the napkins I bought from the thrift store were red, so I also bought a flannel pattern of the same color red which enabled me to use the same thread. I have also decided that red is a great color for napkins since we eat a lot of meals that have at least some tomato in them (Italian, Mexican, hamburgers with ketchup...). I chose the bee pattern because I thought it was cute, but not so cute it would cause my teenage boys to gag. :)
When I first started out sewing the thrift store napkins I was having trouble with the corners. Even though I clipped the fabric, the corners were still thick and one end of the hem would hang out. Then I noticed that the red napkins had different corners and quickly figured a way to do something similar. Here is what I came up with.
First, cut a triangular piece off each corner.

Then fold the cut corner over and press. I don't have exact measurements for this so you have to do it by trial and error, but I quickly figured out about how much to cut and how much to fold.

I then ironed the first fold of the hem, and finally the second fold.

When you iron the second fold, the corner should line up nicely. If you don't have enough room and the two sides are overlapping, redo that first fold where you brought the corner in. Make the fold a little deeper, but not much. If you find you have too much space, make that fold a little more shallow. This is the part you will get the hang of, or maybe you will figure out exact measurements!
You can buy paper napkins pretty cheaply, and it does cost money to make and wash the napkins, but I still think there is some savings in the long run. According to Melissa Breyer, it is definitely greener to use cloth napkins. Here is a post from Frugal Upstate about using cloth vs. paper. I like the idea of using a different napkin ring for each member of the family so that napkins can be saved and reused if they're not too dirty. One of my kids likes using clay. I think I'll have to talk him into making some napkin rings.
As for those dirty napkins, I recently bought a wicker hamper set that included a waste basked and a couple of fabric lined baskets. The waste basket now sits in a corner of the kitchen and we toss the dirty napkins into it. The lined baskets are used to hold the clean napkins.
Labels: frugal tips, homemaking tips
September 12, 2008
Make Your Own Foaming Hand Soap
Here's what I do to make hand washing easy and economical. I bought foaming hand soap for each bathroom and the laundry room. When it was gone, I refilled the bottles using 2 tablespoons of liquid dish soap and water, being sure to leave some room at the top of the bottle for inserting the pump. I then tilt it back and forth a few times to mix it up.

The soap lasts quite a while and we don't have trouble with it drying our skin any more than other soaps. I have learned to eyeball it and don't measure the soap anymore, but if you add too much soap, it can cause the pump to not work well. I have also used the larger bottles that have the foaming dish soap in them. They are not as attractive, though.
For more frugal tips visit Frugal Fridays

Labels: frugal tips, homemaking tips
September 9, 2008
Make Your Own Vanilla Extract

There are quite a few different recipes out there for making vanilla extract. For the quantity I am making, some recipes call for six vanilla beans, others call for three. I use four.
To get started you need a pint of vodka, brandy or rum. I have always used rum, but in searching again recently for recipes I have read that vodka is the best. You also need some vanilla beans. You might find some at a health food store, but you will likely find better prices online. I ordered through Amazon
and bought a pack of 16 beans for $14.95 with free shipping.If you've never seen a vanilla bean, the picture above shows several. If you click to enlarge the picture, you can see that the one under the knife has been slit open. This is done to all the beans. They should be slit lengthwise, but not cut all the way through. And that is almost all there is to it. Slit four beans, put them in a pint of vodka, brandy or rum, and close the lid. Now you need to give it time and some shaking. For the first week, shake the bottle a few times a day. Gradually decrease shaking time over the next month. You will be able to see the extract turning darker. It should sit at least a couple of months before using it. Three months is probably better. I leave the beans in the jar until it is empty. You can top off the bottle with fresh liquor occasionally to keep it going, but I have not actually tried this. What I usually do is every time I start using a new bottle of vanilla, I start making another one. Sometimes I use two beans from the old bottle with two new beans. Like I said, I have read a variety of methods for making vanilla, so you can play around with it and decide what you like best.

The picture on the right shows the bottle I am currently using and a bottle I just started. I'm starting four bottles today. One is for me and the rest will be for Christmas gifts. I will probably look for some nice looking bottles to put the extract in before giving it as a gift. I will also probably divide the pints but keep at least one bean in each bottle to continue giving it flavor.
Making your own vanilla extract is certainly cheaper than buying any brand name extracts. I spent total of $10.75 per 16 ounces on the bottles I just made. I did see a store brand today that was pure extract that would cost less than making your own, but I don't know how the quality is. I do know that it was in a plastic bottle, and I prefer glass. Many people say that making your own gives you much better quality. Depending on how strong it is, you may be able to use less than the amount of vanilla called for in recipes. Personally, I have gotten in the habit of doing it, and I really like it, so I will continue to make my own.
For more kitchen tips visit Tammy's Recipes-Kitchen Tip Tuesday.
Labels: frugal tips, homemaking tips, other recipes
September 7, 2008
Milling Whole Grain Sorghum

After writing the post about milling your own gluten-free flour, I decided that I really should try buying and milling whole grain sorghum. I bought this sorghum from Twin Valley Mills. They only sell 30 pounds, but you can buy smaller quantities of flour. I paid about $15 for the sorghum and $25 for shipping! You couldn't get 30 pounds of sorghum flour for $40 though.

In the picture on the right you see two bowls of flour. The one on the left is Bob's Red Mill sorghum flour and the one on the right is the flour I milled. I couldn't tell any difference by looking at it. When I rubbed the flour between my fingers, mine was slightly courser. I did not have the mill set to the finest setting so I will adjust that next time. I let you know how it does with baking.
Labels: frugal tips, gluten-free diet, homemaking tips
September 5, 2008
Freecycle Fun
What is Freecycle?
"It's a grassroots and entirely nonprofit movement of people who are giving (& getting) stuff for free in their own towns. It's all about reuse and keeping good stuff out of landfills."Basically, you join a yahoo freecycle group in your area. When you have something to give away you post an OFFER message. People then email you directly to make arrangements for pick up. Most of the time the item/items are placed on a porch or somewhere similar so people can swing by and pick it up. When it's gone a TAKEN message is posted. Of course, you also get to view the offers. You can do this by individual emails, daily digests, or web only.
I first joined my local freecycle group because I had something to give away. I think is was a piece of furniture that couldn't be easily donated elsewhere. I have given more than I've gotten, but that's fine with me. I only look at offers on the web occasionally. A few times I have happened to look at the right time. Some of the things I have gotten include, pictures that are now hanging on my walls, an Ethan Allen swivel rocker that is stained but works fine in our family room with a blanket
 on it, a rice cooker, and a cast iron pot.
Everything is always free.
Go to http://www.freecycle.org/ to find a group near you. I bet you'll end up with some great stuff. If you're already part of a freecycle group, leave a comment and let us know what things you have gotten for free.
For more money saving ideas check out Frugal Fridays.

Labels: frugal tips

Subscribe to Posts [Atom]
